
Dryer vents rarely get the attention they deserve, yet they play a critical role in home safety, energy efficiency, and appliance performance. A poorly installed or damaged vent can increase energy bills, reduce dryer efficiency, and even create a serious fire hazard.
Today, we will be discussing everything you need to know about dryer vent repair and installation, helping you make informed decisions whether you plan to handle it yourself or hire a professional.
The Purpose of a Dryer Vent
A dryer vent removes hot, moist air and lint from your dryer and pushes it outside your home. Without proper ventilation, heat and moisture accumulate, creating the perfect conditions for mold growth and structural damage. At the same time, lint buildup restricts airflow, forcing your dryer to work harder and longer.
You might not notice the issue right away. Clothes may take slightly longer to dry, or the laundry room may feel warmer than usual. Over time, these small inefficiencies turn into bigger problems, including higher energy consumption and potential fire risks.
A well-installed and properly maintained vent ensures smooth airflow, improves drying performance, and keeps your home safe.
Signs Your Dryer Vent Needs Repair
- Clothes remain damp or take longer than usual to dry after a full cycle
- The dryer feels excessively hot during or after operation
- Burning smell appears while the dryer is running (possible fire hazard)
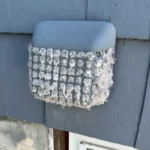
- Lint accumulates around the dryer or near the exterior vent opening
- Weak or no airflow coming from the outside vent
- Laundry room becomes unusually hot or humid
- Vent hood flap outside doesn’t open properly
- Increase in energy bills without a clear reason
- Dryer shuts off mid-cycle due to overheating
- Unusual noises coming from the vent or duct system
Regular inspection can prevent these problems. Even a small lint buildup can cause a dryer vent fire, which accounts for thousands of home fires annually.
Common Causes of Dryer Vent Problems
- Lint buildup inside the vent restricting airflow
- Lack of regular cleaning and maintenance
- Use of low-quality materials such as plastic or foil ducts
- Sagging or crushed flexible ducts trapping lint
- Long vent runs reducing overall efficiency
- Too many bends and turns in the duct system
- Improper sealing of joints causing air leaks
- Poor installation without proper planning
- Blocked exterior vent due to dirt, debris, or dust
- Bird nests or small animals clogging the vent opening
- Damaged or disconnected duct sections
Also Read:
The Importance of Proper Dryer Vent Installation
Installing a dryer vent correctly from the start eliminates many future problems. A well-designed system ensures efficient airflow, reduces drying time, and minimizes safety risks.
- The vent should follow the shortest and straightest path possible to the outside. Each bend or turn reduces airflow efficiency.
- Proper sealing at all joints prevents air leaks and keeps lint from escaping into walls or ceilings.
- Using the right materials matters. Rigid or semi-rigid metal ducts provide durability and resist lint buildup. They also withstand high temperatures better than plastic alternatives.
Material Comparison Table:
| Material | Pros | Cons | Recommended Use |
|---|---|---|---|
| Rigid metal | Durable, safe, low lint buildup | Harder to install | Best for new installations |
| Semi-rigid metal | Easier to work with | Can sag if unsupported | Acceptable if properly supported |
| Plastic/foil | Cheap | Fire hazard, low durability | Not recommended |
A properly installed vent system does more than improve dryer performance, it protects your home, lowers energy bills, and extends the life of your appliance.
Tools and Materials Required for Installation
Before starting a dryer vent installation, gather all necessary tools and materials:
- Drill, vent hood, duct pipes, clamps, foil tape, vent cap
- Measuring tape for accurate lengths
- Level for proper alignment
Pro Tip: Use high-quality metal ducts and foil tape. Standard duct tape can degrade under heat, leading to leaks and lint buildup.
Step-by-Step Dryer Vent Installation Process
- Identify the shortest and most direct path from the dryer to an exterior wall.
- Choose a location that avoids obstacles such as electrical wiring or plumbing.
- Mark the exact spot where the vent will exit the house.
- Cut a properly sized hole for the vent opening.
- Install the exterior vent hood and secure it firmly in place.
- Seal the edges of the vent hood to prevent air leaks and moisture دخول.
- Connect the duct pipe to the dryer outlet securely.
- Attach the duct to the vent hood using clamps or metal fasteners.
- Seal all joints with foil tape to ensure an airtight connection.
- Keep the duct as straight as possible to maintain strong airflow.
- Minimize bends and turns in the duct system.
- Ensure all connections are tight and properly aligned.
- Run the dryer to test the system after installation.
- Check for strong airflow at the exterior vent opening.
- Inspect for any leaks, loose connections, or airflow restrictions.
A straight, short duct path not only improves efficiency but can reduce drying time by 20–30%, saving energy.
How to Repair a Damaged Dryer Vent
Repairing a dryer vent depends on the type and extent of the damage:
- Inspect the entire system, including the duct, connections, and exterior vent.
- Loose connections: Tighten and reseal with foil tape.
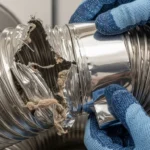
- Crushed or kinked ducts: Replace the damaged section entirely. Reshaping rarely restores proper airflow.
- Blockages: Use a vent cleaning brush or vacuum to remove lint buildup, paying attention to bends and corners.
- Damaged exterior vent cap: Replace promptly to maintain proper airflow and prevent debris entry.
Maintenance Tip: Inspect your dryer vent at least once a year to prevent airflow issues and reduce fire risk.
DIY vs Professional Installation
While some homeowners may attempt a DIY installation, hiring a licensed professional has advantages:
DIY:
- Cheaper upfront
- Requires tools, time, and knowledge
- Risk of improper installation, fire hazards, or voiding dryer warranty
Professional:
- Ensures proper airflow and safety
- Uses high-quality materials and correct installation techniques
- Reduces long-term energy costs and risk of damage
Pro Tip: If your vent has multiple bends, long runs, or complex exterior walls, a professional installation is highly recommended.
Read More:
Energy Efficiency Benefits
A properly installed and maintained dryer vent improves drying efficiency, saving both time and energy. Blocked or inefficient vents can increase drying time by 30% or more, directly raising electricity bills. Regular maintenance protects your appliance and reduces unnecessary energy consumption.
FAQs About Dryer Vents
How often should I clean my dryer vent?
At least once a year, or more if you do heavy laundry.
Can I use a flexible duct for my dryer vent?
Only semi-rigid metal is recommended. Thin plastic or foil ducts are fire hazards.
What happens if my dryer vent is blocked?
Reduced airflow can cause overheating, increased energy bills, and fire risk.
Contact Delta Clean Air DMV for Dryer Vent Repair & Installation Services
Whether you need dryer vent installation or just repair services, contact Delta Clean Air DMV. Our technicians master the art of both repair and installation services for dryer vents. All of them are fully licensed and insured. When you hire us, you ensure that your dryer vent is in expert hands.
Call us now for a free inspection and professional dryer vent service.